sábado, 20 de septiembre de 2014

Using AngularJS to Load Some Photos from Flickr

For the following example we are going to review an easy example of AngularJS to consume
a Json String from Flickr.
We can summarise the process as:
A. Create an HMTL file with ng-directives
B. Use $http to connect to read data from a external server
C. Populate a HTML select element with data
D. Display an image from Flickr
For this example you may use Netbeans 8.01

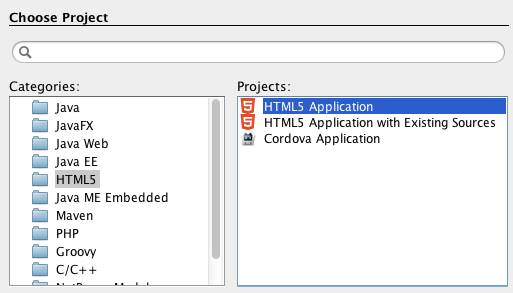
1.Create a new HTML5 project named AJSFlickr and click on Finish


2. Add the following HTML to create the following GUI
<html>
    <head>
        <title>AJS Example</title>
        <meta charset="UTF-8">
        <meta name="viewport" content="width=device-width, initial-scale=1.0">
    </head>
    <body>
        <div>
            Image description:<input type="text">
            <button>Search</button><br/>
            <select>
                <option>select an option</option>
            </select><br/>          
            <img src="" alt=""/>
        </div>  
    </body>
</html>

3. Lets add angularjs script to the previous code and  add the following angularjs directives
data-ng-app:to initialise a AngularJS application
data-ng-model:to bind the HTML elements to dynamic data
data-ng-controller:to create a controller for the elements in the div.
data-ng-click: to perform a click on a button
data-ng-selected:to select an image from the select html element
data-ng-options:to add options for a select

<html data-ng-app="myAJSApp">
    <head>
        <title>AJS Example</title>
        <meta charset="UTF-8">
        <meta name="viewport" content="width=device-width, initial-scale=1.0">
    </head>
    <body>
        <div data-ng-controller="AJSFlickrController">
            Image description:<input type="text" data-ng-model="description">
            <button data-ng-click="searchImage()">Search</button><br/>
            <select data-ng-model="selectedImage" data-ng-options="image.title for image in images.photos.photo track by image.id">
                <option>select an option</option>
            </select><br/>          
            <img src="https://farm{{selectedImage.farm}}.staticflickr.com/{{selectedImage.server}}/{{selectedImage.id}}_{{selectedImage.secret}}.jpg" alt=""/>
        </div>  
        <script src="http://ajax.googleapis.com/ajax/libs/angularjs/1.2.15/angular.min.js"></script>
        <script src="myAJSApp.js"></script>
        <script src="AJSFlickrController.js"></script>
    </body>
</html>

4. Create a javascript file named myAJSApp.js
5. Create a javascript file named AJSFlickrController.js
6. Add the following code to myAJSApp.js to create a module to create a readable application
var app = angular.module("myAJSApp", []);

7. Add the following code to AJSFlickrController.js to use the text entered in the text element and call a function to retrieve the data from
Flickr and populate the select element.

app.config(function ($httpProvider) {
    $httpProvider.defaults.useXDomain = true;
    delete $httpProvider.defaults.headers.common['X-Requested-With'];
});

app.controller("AJSFlickrController", function ($scope, $http) {
    $scope.searchImage = function () {
        $http
                .get('https://api.flickr.com/services/rest', {
                    params: {
                        method: "flickr.photos.search",
                        api_key: "699982303118892e296bd349c4cc536e",
                        text: $scope.description,
                        format: "json"
                    }
                })
                .success(function (response, status) {
                    $scope.images = parseFlickrJson(response);
                });
    };
});

function parseFlickrJson(jsonstring) {
    var data = null;
    var jsonFlickrApi = function (d) {
        data = d;
    }
    eval(jsonstring);
    return data;
}


8. Open the page in a browser


viernes, 18 de julio de 2014

Creating a simple MVC App with Spring 4.0 and WebMvcConfigurerAdapter

1. Download STS(Spring Tool Suite) from http://spring.io/tools/sts

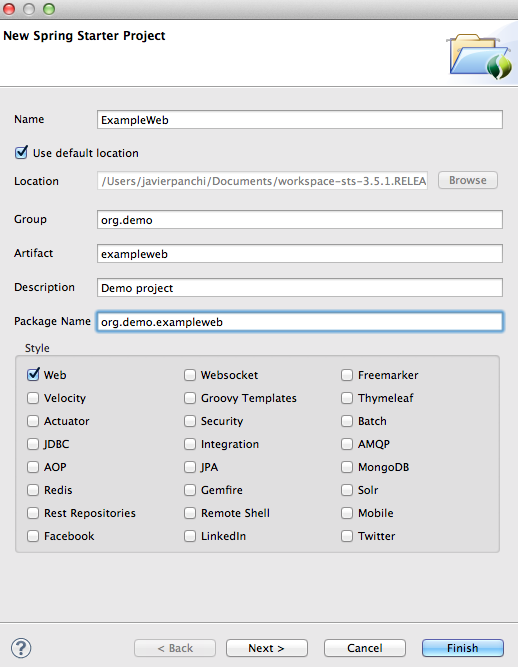
2. Create a new Spring Starter Project

3. Check the Web Options and enter a group(org.demo), artefact(exampleweb), and package name(org.demo.exampleweb).


4. Add the following dependences to pom.xml
<dependency>
<groupId>org.apache.tomcat.embed</groupId>
<artifactId>tomcat-embed-jasper</artifactId>
<version>7.0.54</version>
</dependency>
<dependency>
<groupId>javax.servlet</groupId>
<artifactId>jstl</artifactId>
</dependency>

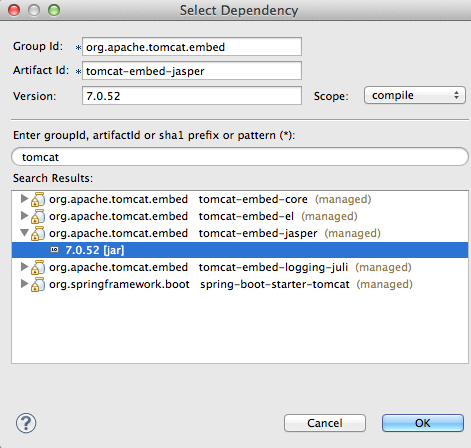
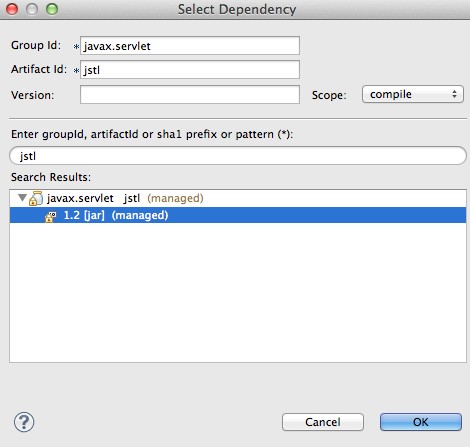
Note: you may add the dependencies with the use of the Dependeces tab such as

For tomcat-embed-jasper:

For jstl


5. Add ViewResolver properties to application.properties in the src/main/resources directory
##View Resolver Configuration
spring.view.prefix=/WEB-INF/jsp
spring.view.suffix=.jsp

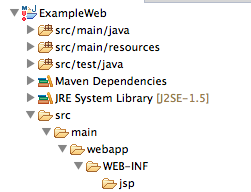
6. Create the following directories in your projects


7. Add a new jsp page named home.jsp. Use the following code for the JSP page
<%@ page language="java" contentType="text/html; charset=UTF-8"
    pageEncoding="UTF-8"%>

This is an example


8. Create a new class named MVCConfiguration in the package org.demo.exampleweb.config
and extend WebMvcConfigurerAdapter class


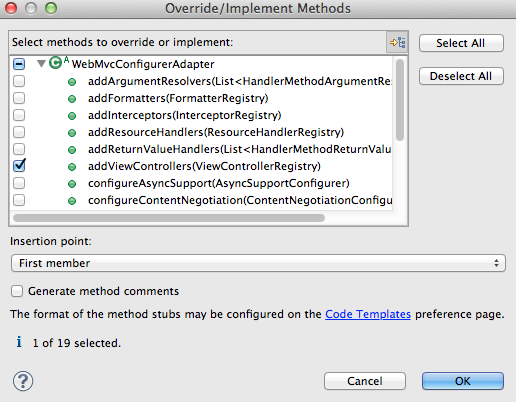
9. Override addViewControllers(ViewControllerRegistry registry) and add the following code


package org.demo.exampleweb.config;

import org.springframework.context.annotation.Configuration;
import org.springframework.web.servlet.config.annotation.ViewControllerRegistry;
import org.springframework.web.servlet.config.annotation.WebMvcConfigurerAdapter;
@Configuration
public class MVCConfiguration extends WebMvcConfigurerAdapter {

@Override
public void addViewControllers(ViewControllerRegistry registry) {
registry.addViewController("/").setViewName("home");
}

}

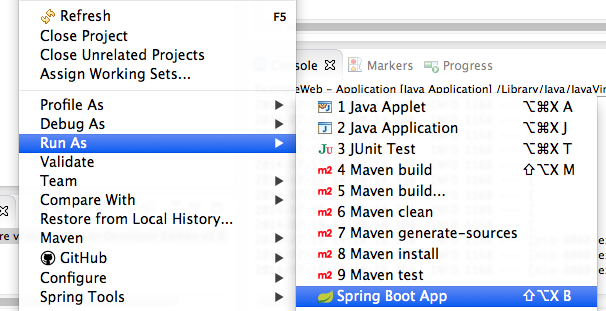
10. Run your App with Spring Boot App


11. Open a browser and enter localhost:8080 as URL


Creating a simple MVC App with Spring 4.0 and Controller Annotation

1. Download STS(Spring Tool Suite) from http://spring.io/tools/sts

2. Create a new Spring Starter Project

3. Check the Web Options and enter a group(org.demo), artefact(exampleweb), and package name(org.demo.exampleweb).


4. Add the following dependences to pom.xml
<dependency>
<groupId>org.apache.tomcat.embed</groupId>
<artifactId>tomcat-embed-jasper</artifactId>
<version>7.0.54</version>
</dependency>
<dependency>
<groupId>javax.servlet</groupId>
<artifactId>jstl</artifactId>
</dependency>

Note: you may add the dependencies with the use of the Dependeces tab such as

For tomcat-embed-jasper:

For jstl


5. Add ViewResolver properties to application.properties in the src/main/resources directory
##View Resolver Configuration
spring.view.prefix=/WEB-INF/jsp
spring.view.suffix=.jsp

6. Create the following directories in your projects


7. Add a new jsp page named home.jsp. Use the following code for the JSP page
<%@ page language="java" contentType="text/html; charset=UTF-8"
    pageEncoding="UTF-8"%>

This is an example


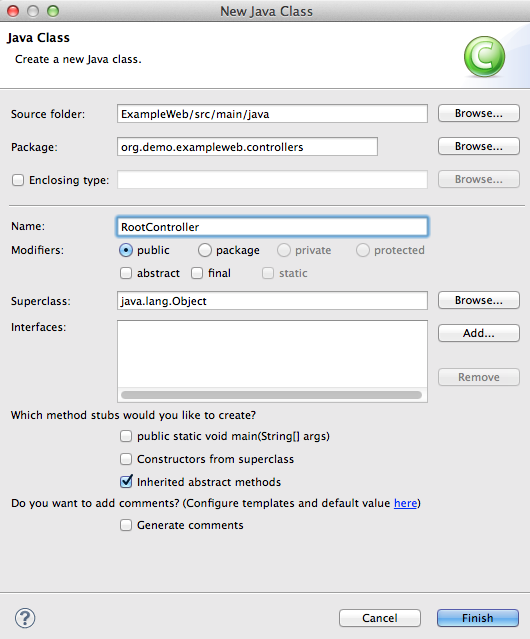
8.Create a new class named RootController in the package org.demo.exampleweb.controllers

9. Add the following code

package org.demo.exampleweb.controllers;

import org.springframework.stereotype.Controller;
import org.springframework.web.bind.annotation.RequestMapping;

@Controller
public class RootController {
@RequestMapping("/")
public String showHomePage(){
return "home";
}
}

10. Run your App with Spring Boot App

11. Open a browser and enter localhost:8080 as URL