sábado, 20 de septiembre de 2014

Using AngularJS to Load Some Photos from Flickr

For the following example we are going to review an easy example of AngularJS to consume
a Json String from Flickr.
We can summarise the process as:
A. Create an HMTL file with ng-directives
B. Use $http to connect to read data from a external server
C. Populate a HTML select element with data
D. Display an image from Flickr
For this example you may use Netbeans 8.01

1.Create a new HTML5 project named AJSFlickr and click on Finish


2. Add the following HTML to create the following GUI
<html>
    <head>
        <title>AJS Example</title>
        <meta charset="UTF-8">
        <meta name="viewport" content="width=device-width, initial-scale=1.0">
    </head>
    <body>
        <div>
            Image description:<input type="text">
            <button>Search</button><br/>
            <select>
                <option>select an option</option>
            </select><br/>          
            <img src="" alt=""/>
        </div>  
    </body>
</html>

3. Lets add angularjs script to the previous code and  add the following angularjs directives
data-ng-app:to initialise a AngularJS application
data-ng-model:to bind the HTML elements to dynamic data
data-ng-controller:to create a controller for the elements in the div.
data-ng-click: to perform a click on a button
data-ng-selected:to select an image from the select html element
data-ng-options:to add options for a select

<html data-ng-app="myAJSApp">
    <head>
        <title>AJS Example</title>
        <meta charset="UTF-8">
        <meta name="viewport" content="width=device-width, initial-scale=1.0">
    </head>
    <body>
        <div data-ng-controller="AJSFlickrController">
            Image description:<input type="text" data-ng-model="description">
            <button data-ng-click="searchImage()">Search</button><br/>
            <select data-ng-model="selectedImage" data-ng-options="image.title for image in images.photos.photo track by image.id">
                <option>select an option</option>
            </select><br/>          
            <img src="https://farm{{selectedImage.farm}}.staticflickr.com/{{selectedImage.server}}/{{selectedImage.id}}_{{selectedImage.secret}}.jpg" alt=""/>
        </div>  
        <script src="http://ajax.googleapis.com/ajax/libs/angularjs/1.2.15/angular.min.js"></script>
        <script src="myAJSApp.js"></script>
        <script src="AJSFlickrController.js"></script>
    </body>
</html>

4. Create a javascript file named myAJSApp.js
5. Create a javascript file named AJSFlickrController.js
6. Add the following code to myAJSApp.js to create a module to create a readable application
var app = angular.module("myAJSApp", []);

7. Add the following code to AJSFlickrController.js to use the text entered in the text element and call a function to retrieve the data from
Flickr and populate the select element.

app.config(function ($httpProvider) {
    $httpProvider.defaults.useXDomain = true;
    delete $httpProvider.defaults.headers.common['X-Requested-With'];
});

app.controller("AJSFlickrController", function ($scope, $http) {
    $scope.searchImage = function () {
        $http
                .get('https://api.flickr.com/services/rest', {
                    params: {
                        method: "flickr.photos.search",
                        api_key: "699982303118892e296bd349c4cc536e",
                        text: $scope.description,
                        format: "json"
                    }
                })
                .success(function (response, status) {
                    $scope.images = parseFlickrJson(response);
                });
    };
});

function parseFlickrJson(jsonstring) {
    var data = null;
    var jsonFlickrApi = function (d) {
        data = d;
    }
    eval(jsonstring);
    return data;
}


8. Open the page in a browser


viernes, 18 de julio de 2014

Creating a simple MVC App with Spring 4.0 and WebMvcConfigurerAdapter

1. Download STS(Spring Tool Suite) from http://spring.io/tools/sts

2. Create a new Spring Starter Project

3. Check the Web Options and enter a group(org.demo), artefact(exampleweb), and package name(org.demo.exampleweb).


4. Add the following dependences to pom.xml
<dependency>
<groupId>org.apache.tomcat.embed</groupId>
<artifactId>tomcat-embed-jasper</artifactId>
<version>7.0.54</version>
</dependency>
<dependency>
<groupId>javax.servlet</groupId>
<artifactId>jstl</artifactId>
</dependency>

Note: you may add the dependencies with the use of the Dependeces tab such as

For tomcat-embed-jasper:

For jstl


5. Add ViewResolver properties to application.properties in the src/main/resources directory
##View Resolver Configuration
spring.view.prefix=/WEB-INF/jsp
spring.view.suffix=.jsp

6. Create the following directories in your projects


7. Add a new jsp page named home.jsp. Use the following code for the JSP page
<%@ page language="java" contentType="text/html; charset=UTF-8"
    pageEncoding="UTF-8"%>

This is an example


8. Create a new class named MVCConfiguration in the package org.demo.exampleweb.config
and extend WebMvcConfigurerAdapter class


9. Override addViewControllers(ViewControllerRegistry registry) and add the following code


package org.demo.exampleweb.config;

import org.springframework.context.annotation.Configuration;
import org.springframework.web.servlet.config.annotation.ViewControllerRegistry;
import org.springframework.web.servlet.config.annotation.WebMvcConfigurerAdapter;
@Configuration
public class MVCConfiguration extends WebMvcConfigurerAdapter {

@Override
public void addViewControllers(ViewControllerRegistry registry) {
registry.addViewController("/").setViewName("home");
}

}

10. Run your App with Spring Boot App


11. Open a browser and enter localhost:8080 as URL


Creating a simple MVC App with Spring 4.0 and Controller Annotation

1. Download STS(Spring Tool Suite) from http://spring.io/tools/sts

2. Create a new Spring Starter Project

3. Check the Web Options and enter a group(org.demo), artefact(exampleweb), and package name(org.demo.exampleweb).


4. Add the following dependences to pom.xml
<dependency>
<groupId>org.apache.tomcat.embed</groupId>
<artifactId>tomcat-embed-jasper</artifactId>
<version>7.0.54</version>
</dependency>
<dependency>
<groupId>javax.servlet</groupId>
<artifactId>jstl</artifactId>
</dependency>

Note: you may add the dependencies with the use of the Dependeces tab such as

For tomcat-embed-jasper:

For jstl


5. Add ViewResolver properties to application.properties in the src/main/resources directory
##View Resolver Configuration
spring.view.prefix=/WEB-INF/jsp
spring.view.suffix=.jsp

6. Create the following directories in your projects


7. Add a new jsp page named home.jsp. Use the following code for the JSP page
<%@ page language="java" contentType="text/html; charset=UTF-8"
    pageEncoding="UTF-8"%>

This is an example


8.Create a new class named RootController in the package org.demo.exampleweb.controllers

9. Add the following code

package org.demo.exampleweb.controllers;

import org.springframework.stereotype.Controller;
import org.springframework.web.bind.annotation.RequestMapping;

@Controller
public class RootController {
@RequestMapping("/")
public String showHomePage(){
return "home";
}
}

10. Run your App with Spring Boot App

11. Open a browser and enter localhost:8080 as URL


jueves, 23 de febrero de 2012

Spring MVC 3.0 y Maven

For this example I'm using MacBook Pro with Mac OS x 10.7.2, SpringSource Tool Suite  2.8.1 and Maven 2.0

First of all, we have to create a maven project.

Next check the first checkbox to avoid creating the application with a archetype.

The code of the file pom.xml is the following(Notice that I added dependencies and plugins to deploy the app on Jetty)
<project xmlns="http://maven.apache.org/POM/4.0.0" xmlns:xsi="http://www.w3.org/2001/XMLSchema-instance"
    xsi:schemaLocation="http://maven.apache.org/POM/4.0.0 http://maven.apache.org/xsd/maven-4.0.0.xsd">
    <modelVersion>4.0.0</modelVersion>
    <groupId>com.example.web</groupId>
    <artifactId>SF</artifactId>
    <version>0.0.1-SNAPSHOT</version>
    <packaging>war</packaging>
    <build>
        <finalName>AplicacionWeb</finalName>
        <plugins>
            <plugin>
                <artifactId>maven-compiler-plugin</artifactId>
                <configuration>
                    <source>1.6</source>
                    <target>1.6</target>
                </configuration>
            </plugin>
            <plugin>
                <groupId>org.mortbay.jetty</groupId>
                <artifactId>maven-jetty-plugin</artifactId>
            </plugin>
        </plugins>
    </build>
    <dependencies>
        <dependency>
            <groupId>org.springframework</groupId>
            <artifactId>spring-webmvc</artifactId>
            <version>3.0.6.RELEASE</version>
        </dependency>
        <dependency>
            <groupId>javax.servlet</groupId>
            <artifactId>jstl</artifactId>
            <version>1.2</version>
            <scope>provided</scope>
        </dependency>
    </dependencies>
</project>

Next you have to run eclipse:eclipse to run the project and download the libraries to your project.

After this, you have to refresh the project. 

Next, create the package com.example.model.
Into this package you have to create the a Java class named Product. This class should implements Serializable. Also, it contains the following code:

package com.example.model;

import java.io.Serializable;

public class Product implements Serializable{
    private static final long serialVersionUID = 1L;
    private String name;
    private Double price;
    public String getName() {
        return name;
    }
    public void setName(String name) {
        this.name = name;
    }
    public Double getPrice() {
        return price;
    }
    public void setPrice(Double price) {
        this.price = price;
    }
}

Next, create a package named com.example.service
Into this package create an interface named ProductService.
This interface have two functions.
ListgetAllProducts()       -- To retrieve all the products
void addProduct(Product product)  -- To add a product.

This is the code of the ProductService:
package com.example.service;

package com.example.service;

import java.util.List;

import com.example.model.Product;

public interface ProductService {
    List<Product> getAllProducts();
    void addProduct(Product product);
}

The we have to implement the Interface, hence we create a new package named com.example.impl This package will contain a class named ProductServiceImpl. This is a service class, so it implements the @Service annotation. This is the code for ProductServiceImpl.java

package com.example.impl;

import java.util.ArrayList;
import java.util.List;

import org.springframework.stereotype.Service;

import com.example.model.Product;
import com.example.service.ProductService;
@Service
public class ProductServiceImpl implements ProductService {
    List products=new ArrayList();
   
    public List getAllProducts() {
        return products;
    }
   
    public void addProduct(Product product) {
        products.add(product);
    }
}


Next, we have to create the controller.
Create a package named com.example.controller. Into this package you have to create a Class named ProductController:
package com.example.controller;

import org.springframework.beans.factory.annotation.Autowired;
import org.springframework.stereotype.Controller;
import org.springframework.web.bind.annotation.ModelAttribute;
import org.springframework.web.bind.annotation.RequestMapping;
import org.springframework.web.bind.annotation.RequestMethod;
import org.springframework.web.servlet.ModelAndView;

import com.example.model.Product;
import com.example.service.ProductService;

@Controller
@RequestMapping(value="product")// This is also the path of the URL after the App
public class ProductController {
    @Autowired
    private ProductService productService;
  
    /*
     * When a link from the app calls viewAllProducts this function is called.
     * Also the list object is updated with the use of the function addObject and
     * the variable products
     */
    @RequestMapping(value="listProducts",method=RequestMethod.GET)
    public ModelAndView viewAll(){
        ModelAndView mav=new ModelAndView();
        mav.setViewName("list");//The name of the JSP page
        mav.addObject("products",productService.getAllProducts());
        return mav;
    }
  
    /*
     * When a link from the app calls newProduct this function is called.
     * Also the product is added to the current list of products. Also a new empty
     * instance of the object is created.
     */
    @RequestMapping(value="newProduct",method=RequestMethod.GET)
    public ModelAndView newproduct(){
        ModelAndView mav=new ModelAndView();
        mav.setViewName("new");//The name of the JSP page
        mav.addObject("product",new Product());
        return mav;
    }
  
    /*
     * When a link from the app calls newProduct this function is called.
     * Also the product is added to the current list of products. Also a new empty
     * instance of the object is created.
     */
    @RequestMapping(value="addProduct",method=RequestMethod.POST)
    public String add(@ModelAttribute(value="product") Product product){
        productService.addProduct(product);
        return "redirect:listProducts.htm";
    }
}


After this, we have to create the following route of directories webapp/WEB-INF/jsp  into src/main.
Into webapp/WEB-INF we have to create two xml files web.xml and dispatcher-servlet.xml.
web.xml will be configurated to support the Servlet for the use of Springfrmework also its mapping.
This is code for web.xml:
<?xml version="1.0" encoding="UTF-8"?>
<web-app version="3.0" xmlns="http://java.sun.com/xml/ns/javaee"
    xmlns:xsi="http://www.w3.org/2001/XMLSchema-instance"
    xsi:schemaLocation="http://java.sun.com/xml/ns/javaee http://java.sun.com/xml/ns/javaee/web-app_3_0.xsd">
    <servlet>
        <servlet-name>dispatcher</servlet-name>
        <servlet-class>org.springframework.web.servlet.DispatcherServlet</servlet-class>
        
    </servlet>
    <servlet-mapping>
        <servlet-name>dispatcher</servlet-name>
        <url-pattern>*.htm</url-pattern>
    </servlet-mapping>
    <welcome-file-list>
        <welcome-file>index.jsp</welcome-file>
    </welcome-file-list>
</web-app>

The file dispatcher-server.xml has the springframework configuration to locate the implementation of the services and controllers. Also it is used to specify the directories where the jsp are stored.
This is the source code of dispatcher-server.xml
<?xml version="1.0" encoding="UTF-8"?>
<beans xmlns="http://www.springframework.org/schema/beans"
         xmlns:xsi="http://www.w3.org/2001/XMLSchema-instance"
         xmlns:context="http://www.springframework.org/schema/context"
         xsi:schemaLocation="http://www.springframework.org/schema/beans
                             http://www.springframework.org/schema/beans/spring-beans.xsd
                             http://www.springframework.org/schema/context
                             http://www.springframework.org/schema/context/spring-context.xsd">
<context:component-scan base-package="com.example.controller"/>
<context:component-scan base-package="com.example.impl"/>
<context:annotation-config />     
<bean id="viewResolver"
          class="org.springframework.web.servlet.view.InternalResourceViewResolver">
          <property name="prefix"><value>/WEB-INF/jsp/</value></property>
          <property name="suffix"><value>.jsp</value></property>
          </bean>    
</beans>


Next, we have to create the JSP pages into webapp/WEB-INF/jsp.
 The information will be displayed with the help of SpringFramework JSTL.
Next, we have to create a JSP named index.jsp to redirect the app to the list of products. So that, create a page named index.jsp at webapp directory with the following code:
<jsp:forward page="product/listProducts.htm"></jsp:forward>


Create a JSP page named as  include.jsp. This page will be used to save the calls to the JSTL libraries. This is the code for include.jsp:
<%@page isELIgnored="false" %>
<%@ taglib prefix="c" uri="http://java.sun.com/jsp/jstl/core"%>
<%@ taglib prefix="fmt" uri="http://java.sun.com/jsp/jstl/fmt"%>


Next, create a JSP named list.jsp
This page will display the information of the products in memory.<%@ include file="include.jsp"%>
<html>
<head>
<meta http-equiv="Content-Type" content="text/html; charset=ISO-8859-1">
<title>Product List</title>
</head>
<body>
<table>
<tr>
<td>Product Name</td>
<td>Price</td>
</tr>
<c:forEach items="${products}" var="product">
<tr>
<td>${product.name}</td>
<td>${product.price}</td>
</tr>
</c:forEach>
</table>
<a href="/SF/product/newProduct.htm">Add New Product</a>
</body>
</html>

Also, create a page named new.jsp This page will add a product to the current list in memory.
<%@ include file="include.jsp"%>
<%@taglib prefix="form" uri="http://www.springframework.org/tags/form" %>
<html>
<head>
<meta http-equiv="Content-Type" content="text/html; charset=ISO-8859-1">
<title>New Product</title>
</head>
<body>
<form:form action="addProduct.htm" method="post" commandName="product">
Product Name:<form:input path="name"/>
Price:<form:input path="price"/>
<input type="submit" value="add"/>
</form:form>
</body>
</html>
Run the app with mvn jetty:run
Finally open an Internet browser at http://localhost:8080/SF


martes, 24 de enero de 2012

Jtwitter

For this example I'm using a MacBook Pro with Lion, Netbeans and JDK1.6

First of all you have to create a Twitter app, hence you have to go to dev.twitter.com and log in with your twitter account
Next create a new application with the details related to your app.
Then click on setting and change the Application Type to Read, Write and Access direct messages
 
Then  click on update this twitter application's settings

Create my Access tokens


First of all you need the following libraries
common-codec-1.4.jar http://mirrors.ibiblio.org/pub/mirrors/maven2/commons-codec/commons-codec/1.4/commons-codec-1.4.jar
jtwitter.jar http://www.winterwell.com/software/jtwitter/jtwitter.jar
sign-core-1.2.1.1.jar http://code.google.com/p/oauth-signpost/downloads/detail?name=signpost-core-1.2.1.1.jar

Next create a Web application with Netbeans

In the index.jsp set the following code.
<%@page contentType="text/html" pageEncoding="UTF-8"%>
<!DOCTYPE html>
<html>
    <head>
        <meta http-equiv="Content-Type" content="text/html; charset=UTF-8">
        <title>JSP Page</title>
    </head>
    <body>
        <form name="form1" action="NewServlet" method="Post">
        User:<input type="textfield" name="user"/><br/>
        Message:<input type="textfield" name="message"/><br/>
        <input type="submit" value="Enviar"/>
        </form>
    </body>
</html>

Next create a Servlet. You may call it NewServlet
with the following code:


package com.ejemplo;

import java.io.IOException;
import java.io.PrintWriter;
import java.util.Date;
import javax.servlet.ServletException;
import javax.servlet.http.HttpServlet;
import javax.servlet.http.HttpServletRequest;
import javax.servlet.http.HttpServletResponse;
import winterwell.jtwitter.OAuthSignpostClient;
import winterwell.jtwitter.Twitter;

public class NewServlet extends HttpServlet {
    protected void processRequest(HttpServletRequest request, HttpServletResponse response)
            throws ServletException, IOException {
        String JTWITTER_OAUTH_KEY = "xxxxxxxxxxxxxxxxxxxxxxxxx";
        String JTWITTER_OAUTH_SECRET = "XXXXXXXXXXXXXXXXXX";
        String JTWITTER_ACCESS_TOKEN = "yyyyyyyyyyyyyyyyyyyyyyyyyy";
        String JTWITTER_ACCESS_TOKEN_SECRET = "YYYYYYYYYYYYYYY";
        response.setContentType("text/html;charset=UTF-8");
        PrintWriter out = response.getWriter();
        try {
            out.println("Your Message was sent");
            OAuthSignpostClient oauthClient = new OAuthSignpostClient(JTWITTER_OAUTH_KEY, JTWITTER_OAUTH_SECRET, JTWITTER_ACCESS_TOKEN, JTWITTER_ACCESS_TOKEN_SECRET);
            Twitter twitter = new Twitter(request.getParameter("user"), oauthClient);
            String fecha = (new Date()).toString();
            twitter.updateStatus(request.getParameter("message") + fecha);
        } catch (Exception ex) {
            out.println(ex.getMessage());
            ex.printStackTrace();
        } finally {
            out.close();
        }
    }

    //
    /**
     * Handles the HTTP GET method.
     * @param request servlet request
     * @param response servlet response
     * @throws ServletException if a servlet-specific error occurs
     * @throws IOException if an I/O error occurs
     */
    @Override
    protected void doGet(HttpServletRequest request, HttpServletResponse response)
            throws ServletException, IOException {
        processRequest(request, response);
    }

    /**
     * Handles the HTTP POST method.
     * @param request servlet request
     * @param response servlet response
     * @throws ServletException if a servlet-specific error occurs
     * @throws IOException if an I/O error occurs
     */
    @Override
    protected void doPost(HttpServletRequest request, HttpServletResponse response)
            throws ServletException, IOException {
        processRequest(request, response);
    }

    /**
     * Returns a short description of the servlet.
     * @return a String containing servlet description
     */
    @Override
    public String getServletInfo() {
        return "Short description";
    }//

}

Replace xxxxx with Consumer key
Replace XXXX with Consumer secret
Replace yyyyy with  Access token
Replace YYYY with Access token secret

Finally upload you application to a webserver and run the app


martes, 22 de noviembre de 2011

An example of Weka and Java Persistence API

For this example I'm using MacBook Pro with Lion, Netbeans 6.9, MySQL Database.
First of all, we have to create a database in MySQL to retrieve the data. You can use the following script:


CREATE DATABASE IF NOT EXISTS exampleWeka;
USE exampleWeka;
DROP TABLE IF EXISTS weather;
CREATE TABLE  weather (
    id INT NOT NULL AUTO_INCREMENT, PRIMARY KEY(id),
    outlook varchar(10),
    temperature varchar(10),
    humidity varchar(10),
    windy varchar(10),
    play varchar(10)
);
insert into weather(outlook,temperature,humidity,windy,play)values('sunny','hot','high','FALSE','no');
insert into weather(outlook,temperature,humidity,windy,play)values('sunny','hot','high','TRUE','no');
insert into weather(outlook,temperature,humidity,windy,play)values('overcast','hot','high','FALSE','yes');
insert into weather(outlook,temperature,humidity,windy,play)values('rainy','mild','high','FALSE','yes');
insert into weather(outlook,temperature,humidity,windy,play)values('rainy','cool','normal','FALSE','yes');
insert into weather(outlook,temperature,humidity,windy,play)values('rainy','cool','normal','TRUE','no');
insert into weather(outlook,temperature,humidity,windy,play)values('overcast','cool','normal','TRUE','yes');
insert into weather(outlook,temperature,humidity,windy,play)values('sunny','mild','high','FALSE','no');
insert into weather(outlook,temperature,humidity,windy,play)values('sunny','cool','normal','FALSE','yes');
insert into weather(outlook,temperature,humidity,windy,play)values('rainy','mild','normal','FALSE','yes');
insert into weather(outlook,temperature,humidity,windy,play)values('sunny','mild','normal','TRUE','yes');
insert into weather(outlook,temperature,humidity,windy,play)values('overcast','mild','high','TRUE','yes');
insert into weather(outlook,temperature,humidity,windy,play)values('overcast','hot','normal','FALSE','yes');
insert into weather(outlook,temperature,humidity,windy,play)values('rainy','mild','high','TRUE','no');
commit;


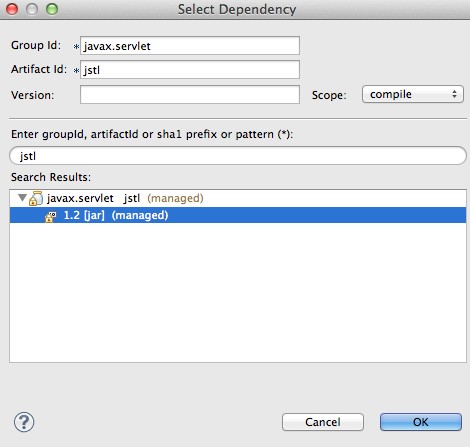
Then you can download Weka. I downloaded the version 3.4.19 from  http://sourceforge.net/projects/weka/files/weka-3-4/3.4.19/weka-3-4-19.zip/download. Then you have to extract the file and add weka.jar to the libraries of your EJB project

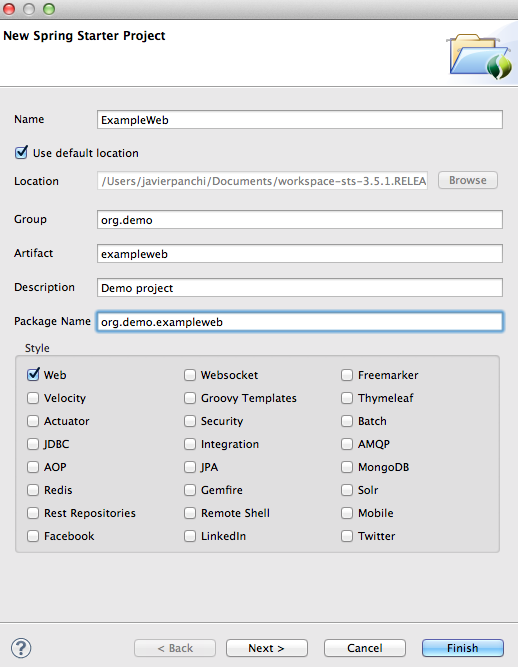
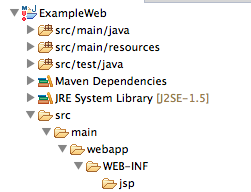
Then you have to create an Enterprise Application project in Netbeans.


Add MySQL library to the EJB Project.

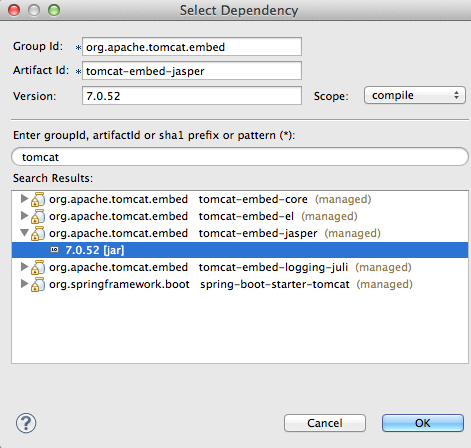
Add the library weka.jar to the EJB project. I'm using the version available at:http://sourceforge.net/projects/weka/files/weka-3-7/3.7.5/weka-3-7-5-monolithic.jar/download

After this, create a Datasource to the database created above.

Create an Entity class to use the weather table.

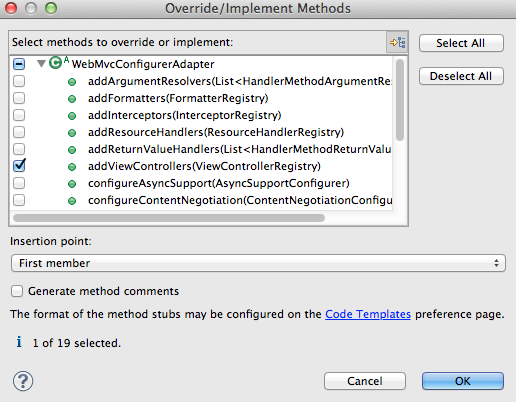
Create a Session bean with remote interface.

Create the following utility class in the package com.example.ejb.util of the EJB project


package com.example.ejb.util;

import com.example.ejb.entity.Weather;
import java.util.List;
import weka.classifiers.trees.J48;
import weka.core.Attribute;
import weka.core.FastVector;
import weka.core.Instance;
import weka.core.Instances;

public class UtilWeka {
    static Instances instances = null;

    private static FastVector createAttributes(boolean classification) {
        FastVector fvWekaAttributes = new FastVector(9);
        FastVector fvOutlook = new FastVector(3);
        fvOutlook.addElement("sunny");
        fvOutlook.addElement("overcast");
        fvOutlook.addElement("rainy");
        Attribute outlook = new Attribute("outlook", fvOutlook);
        fvWekaAttributes.addElement(outlook);

        FastVector fvTemperature = new FastVector(3);
        fvTemperature.addElement("hot");
        fvTemperature.addElement("mild");
        fvTemperature.addElement("cool");
        Attribute temperature = new Attribute("temperature", fvTemperature);
        fvWekaAttributes.addElement(temperature);

        FastVector fvHumidity = new FastVector(2);
        fvHumidity.addElement("high");
        fvHumidity.addElement("normal");
        Attribute humidity = new Attribute("humidity", fvHumidity);
        fvWekaAttributes.addElement(humidity);

        FastVector fvWindy = new FastVector(2);
        fvWindy.addElement("TRUE");
        fvWindy.addElement("FALSE");
        Attribute windy = new Attribute("windy", fvWindy);
        fvWekaAttributes.addElement(windy);


        if(!classification){
        FastVector fvPlay = new FastVector(2);
        fvPlay.addElement("no");
        fvPlay.addElement("yes");
        Attribute play = new Attribute("play", fvPlay);
        fvWekaAttributes.addElement(play);
        }

        return fvWekaAttributes;
    }

    private static Instances generateInstances(List list) {
        FastVector fvAttributes = createAttributes(false);
        Instances instances = new Instances("Rel", fvAttributes, 5);
        instances.setClassIndex(instances.numAttributes() - 1);
        for (Weather weather : list) {
            Instance iExample = new Instance(5);
            iExample.setValue((Attribute) fvAttributes.elementAt(0), weather.getOutlook());
            iExample.setValue((Attribute) fvAttributes.elementAt(1), weather.getTemperature());
            iExample.setValue((Attribute) fvAttributes.elementAt(2), weather.getHumidity());
            iExample.setValue((Attribute) fvAttributes.elementAt(3), weather.getWindy());
            iExample.setValue((Attribute) fvAttributes.elementAt(4), weather.getPlay());
            instances.add(iExample);
        }
        return instances;
    }

    private static Instance generateWeatherInstance(Weather weather) {
        FastVector fvAttributes = createAttributes(true);
        Instances instances = new Instances("Rel", fvAttributes, 9);
        instances.setClassIndex(instances.numAttributes() - 1);


        Instance iExample = new Instance(9);
        iExample.setValue((Attribute) fvAttributes.elementAt(0), weather.getOutlook());
        iExample.setValue((Attribute) fvAttributes.elementAt(1), weather.getTemperature());
        iExample.setValue((Attribute) fvAttributes.elementAt(2), weather.getHumidity());
        iExample.setValue((Attribute) fvAttributes.elementAt(3), weather.getWindy());
       // iExample.setValue((Attribute) fvAttributes.elementAt(4), weather.getPlay());

        instances.add(iExample);

        return instances.firstInstance();
    }

    public static void initJ48Tree(List list) {
        instances=generateInstances(list);
        try {
            J48 j48 = new J48();
            instances.setClassIndex(instances.numAttributes() - 1);
            j48.buildClassifier(instances);
            System.out.println(j48.toString());
        } catch (Exception ex) {
            ex.printStackTrace();
        }
    }

    public static void classifyInstanceJ48(Weather weather) {
        double val=0;
        try {
            J48 j48 = new J48();
            instances.setClassIndex(instances.numAttributes() - 1);
            j48.buildClassifier(instances);
            val=j48.classifyInstance(generateWeatherInstance(weather));
            if(val==1){
                System.out.println("We can play");
            }else{
                System.out.println("We can't play");
            }
           
        } catch (Exception ex) {
            ex.printStackTrace();
        }
    }
}
 

Change SessionBean to: 


package com.example.ejb.session;

import com.example.ejb.entity.Weather;
import com.example.ejb.util.UtilWeka;
import java.util.List;
import javax.ejb.Stateless;
import javax.persistence.EntityManager;
import javax.persistence.PersistenceContext;
import javax.persistence.Query;
import weka.core.Instances;

@Stateless
public class SessionBean implements SessionBeanRemote {

    @PersistenceContext
EntityManager em;
Instances instances =null;
    public void initWeatherData() {
        Query query=em.createNamedQuery("Weather.findAll");
        UtilWeka.initJ48Tree((List)query.getResultList());
}

    public void classifyJ48(Weather weather) {
        UtilWeka.classifyInstanceJ48(weather);
    }
   
}


Modify the client with an injection to the Session Bean.

package mavenwekaapp;

import com.example.ejb.entity.Weather;
import com.example.ejb.session.SessionBeanRemote;
import javax.ejb.EJB;

public class Main {
    @EJB
    private static SessionBeanRemote sessionBean;


    public static void main(String[] args) {
        sessionBean.initWeatherData();
        Weather wheater=new Weather();
        wheater.setHumidity("normal");
        wheater.setOutlook("overcast");
        wheater.setTemperature("hot");
        wheater.setWindy("FALSE");
        sessionBean.classifyJ48(wheater);
    }
}


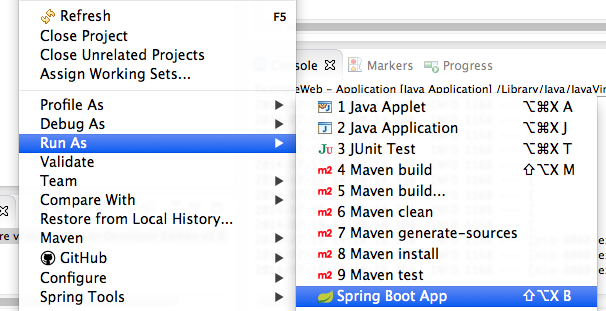
Run the Enterprise Project.


These are functions,which implement ID3 and NBTree algorithms.
public static void initId3Tree(List list) {
        instances=generateInstances(list);
        try {
            Id3 id3 = new Id3();
            instances.setClassIndex(instances.numAttributes() - 1);
            id3.buildClassifier(instances);
            System.out.println(id3.toString());
        } catch (Exception ex) {
            ex.printStackTrace();
        }
    }

    public static void classifyInstanceId3(Weather weather) {
        double val=0;
        try {
            Id3 id3 = new Id3();
            instances.setClassIndex(instances.numAttributes() - 1);
            id3.buildClassifier(instances);
            val=id3.classifyInstance(generateWeatherInstance(weather));
            if(val==1){
                System.out.println("We can play");
            }else{
                System.out.println("We can't play");
            }
           
        } catch (Exception ex) {
            ex.printStackTrace();
        }
    }


    public static void initNBTree(List list) {
        instances=generateInstances(list);
        try {
            NBTree nbTree = new NBTree();
            instances.setClassIndex(instances.numAttributes() - 1);
            nbTree.buildClassifier(instances);
            System.out.println(nbTree.toString());
        } catch (Exception ex) {
            ex.printStackTrace();
        }
    }

    public static void classifyInstanceNBTree(Weather weather) {
        double val=0;
        try {
            NBTree nbTree = new NBTree();
            instances.setClassIndex(instances.numAttributes() - 1);
            nbTree.buildClassifier(instances);
            val=nbTree.classifyInstance(generateWeatherInstance(weather));
            if(val==1){
                System.out.println("We can play");
            }else{
                System.out.println("We can't play");
            }
           
        } catch (Exception ex) {
            ex.printStackTrace();
        }
    }


jueves, 17 de noviembre de 2011

How to use Facebook Graph API with Javascript

For this example I'm using: MacBook Pro with Lion(10.7.1) as operative system, Netbeans 7.0 and a Facebook account.

This is a quick example of Facebook Graph API. This code allows Facebook users to publish information in their walls, retrieve friends and send message to their friends. To test this code you have to create a Facebook application in https://developers.facebook.com/apps
I named the application as TestGraphAPI:
Enter the captcha value:

Then you have to register the URL of your application, pg: http://localhost:8080/TestGraphAPI.
I created a web java application in Netbeans and pasted the following code in the index jsp page:

<html>
    <head>
        <meta http-equiv="Content-Type" content="text/html; charset=UTF-8">
        <title>Facebook Example</title>
    </head>
    <body>
        <div id="fb-root">
            <script type="text/javascript">

                window.fbAsyncInit = function() {
                    FB.init({appId: 'XXXXXXXXXXXXXXX', status: true, cookie: true, xfbml: true});
                    FB.getLoginStatus(function(response) {
                        if (response.session!=null) {
                            alert("Welcome, you have been logged to Facebook");
                        }else{
                            alert("To use this application you have to be logged at Facebook");
                     
                        }
                    });
                };
                (function() {
                    var scriptFacebook = document.createElement('script');
                    scriptFacebook.type = 'text/javascript';
                    scriptFacebook.src = document.location.protocol +
                        '//connect.facebook.net/en_US/all.js';
                    scriptFacebook.async = true;
                    document.getElementById('fb-root').appendChild(scriptFacebook);
                }());
         
                function obtenerAmigos(){
                    document.getElementById("imagenes").innerHTML="Click on the images to send a message<br/>";
                    FB.api('/me/friends',function(response){
                        for(i=0;i<response.data.length;i++){
                            document.getElementById("imagenes").innerHTML+="<img src='https://graph.facebook.com/"+response.data[i].id+"/picture' onclick='enviarMensaje(\""+response.data[i].id+"\",\""+response.data[i].name+"\")'/>";
                        }
                    });
                }
         
                function escribirMuro(){
                    var mensaje=prompt("What is your message?");
                    FB.api('/me/feed', 'post', { message: mensaje }, function(response) {
                        if (!response || response.error) {
                            alert('A problem ocurred');
                        } else {
                            alert('The message was sent to your wall');
                        }
                 
                    });
                }
             
                function enviarMensaje(id,name){
                    var mensaje=prompt("Enter the message to "+name);
                    FB.api('/'+id+'/feed', 'POST', { message: mensaje }, function(response) {
                        if (!response || response.error) {
                            alert('A problem ocurred');
                        } else {
                            alert('The message was sent to '+name);
                        }
                    });
                 
                }
             
            </script>
        </div>
    <fb:login-button autologoutlink="true" scope="email,status_update,publish_stream,sms"></fb:login-button><br/>
    <input type="button" value="Post on your wall" onclick="escribirMuro()"/>
    <input type="button" value="Get Friends" onclick="obtenerAmigos()"><br/>
    <div id="fb-root">
        <div id="imagenes">

        </div>
    </div>
</body>
</html>

Finally replace the APP ID in XXXXXXXXXXXXXXX


and test the application.